SEW the dress material together with the lining by means of a simple seam,' spread the two materials with the right side up. Put the cord under the groove of the presser exactly on the seam between the dress materials and. lining and sew it with rather long stitches. By sewing down the lining the cord will be on the lower edge of the dress,
PLACE the first cord between the folds of the cloth. Put it under the presser-foot with the cord in the adjusted space, and take care to keep it straight. The machine will stitch it beautifully parallel if only you keep the cord to be sewn in tight up to the last one. This may be best done with the blunt point of a pair of scissors, or blunt pen knife, which will not soil the work. Used for hoods, children's stays, cuffs, collars, ladies underclothing.
FOLD the material for a couple of inches, as in hemming by hand. Slacken the moveable screw of the hemmer and adjust it to the width of the hem you desire. Tighten the moveable screw. Insert the cloth and slide it backwards and forwards to fill the hemmer and press down the hem. Set the appliance so that the stitches shall rome close to the edge of the hem. Hold the work with the right hand, an<1 keep the hemmer just full neither more nor less.
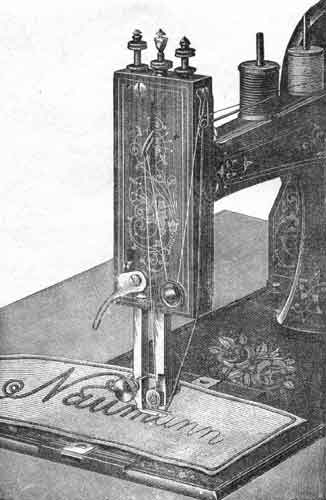
WIND the braid on a reel as shown, or allow the hall of braid to rest in the lap. In turning corners allow the point of the needle to hald the braid. By having a light pressure on the presser-foot the material may be turned gently round without raising the presser-foot. By so working neater corners are made. Have a middle-sized stitch, neither too small nor too large.
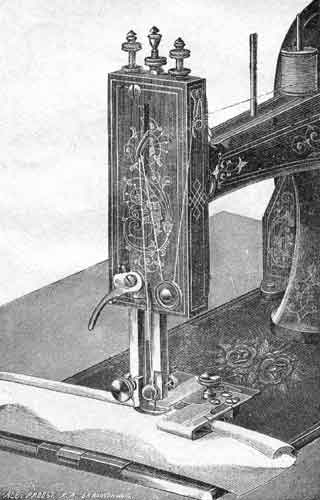
MOST useful for binding anything with braid or ribbon. Fasten the binder to the bedplate of the machine so that its two tongues come even with the point of the needle. Take the binding and pass one edge into the upper tongue and the other into the lower, and place the material to be bound between the two. Draw it about half an inch under the presser-foot so as to give the needle and feed a fair chance of starting the work. Lower the presser-foot and commence to sew. If wide binding is required, move the inside piece of the binder to the right, if narrow, to the left.
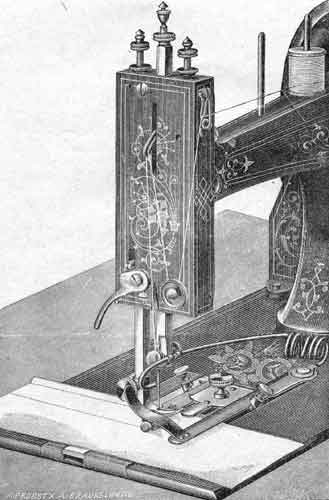
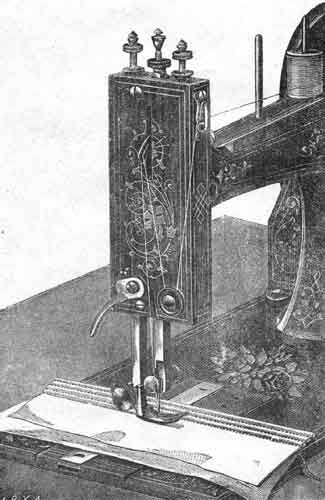
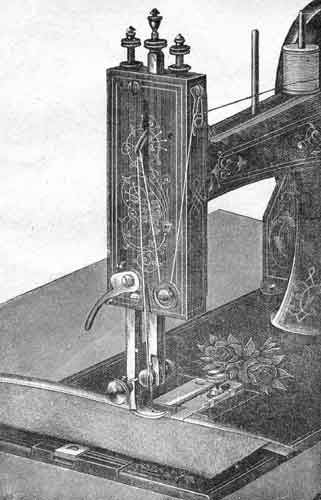
FIX the appliance (as here shown) with the needle passed through the wire loop. Set the gauge to the width of tuck desired. Fold the cloth for the first tuck and place it in position as engraved, As the machine stitches, the creaser marks the place for the next tuck. Fold the material at that crease and proceed as at first. Our new Tuckmarker, just introduced, has a roller creaser. For very small tucks, close together, the straight-guide only is required, for which see page 10. Price extra 5 shillings.
 INSTRUCTIONS
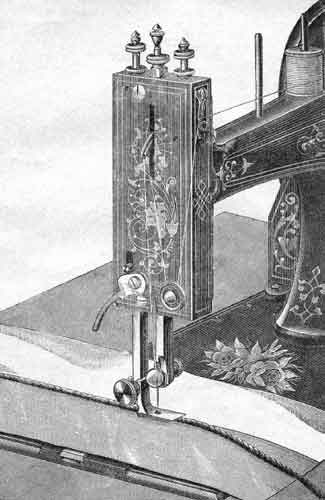
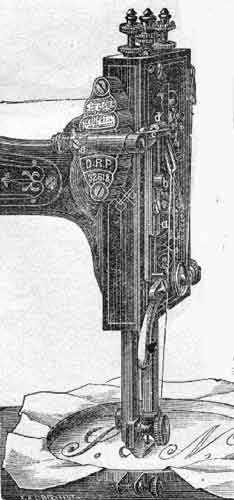
REM0VE the ordinary presser foot, also the ordinary needle plate and replace them with the darning presser foot and the darning needle plate (the latter is simply thicker for the purpose of protecting the feed teeth), Place the material to be darned under the presser foot, lower the same, and bring the needle. bar to its lowest position. Loosen the screw b, press the top d of the bar a down towards the lever c but so that they do not quite touch and tighten again screw b. The stitch regulator is to be fixed for the smallest stitch. The object of the bar b is to regulate the apparatus to every thickness of material. The tension, both of shuttle and top cotton, is to be a light one. Stretch the material to be darned between the two darning rings as tightly and smoothly as possible and so that the hole to be darned is in the centre of the ring. Now begin the darning simply by moving the ring slowly backwards and forwards (of course working the machine all the while) so as to produce rows or strings of stitches lying together as closely as possible, until they cover the hole to be darned; that d.one, turn the ring to the right or to the left, and begin sewing in the same manner, moving the ring backwards and forwards to produce again anti cross- ways close rows of stitches.
The whole operation will be found most simple and easy, though it will take just a few trials to get into the habit of moving the materials to and fro, and always getting one row of stitches close to the previous one.
Note. It will however be found much easier to place over the hole to be darned a piece of fine muslin.
In this case you will only require to cross the darn once, and be most particular to keep each row of stitching as close as possible to the previous row. This operation not only saves half the work but also produces a neater darn.
When embroidering, the design to be embroidered has to be traced on the material which is to be stretched tightly and smoothly in the rings. The ring is then moved same as when darning backwards and forwards.
The parts which move the lever e should be well oiled, also the interior parts through the hole on the top.
To detach the apparatus move the lever c to the left away from the bar a.