THE NEEDLEBAR
Online Manuals Section
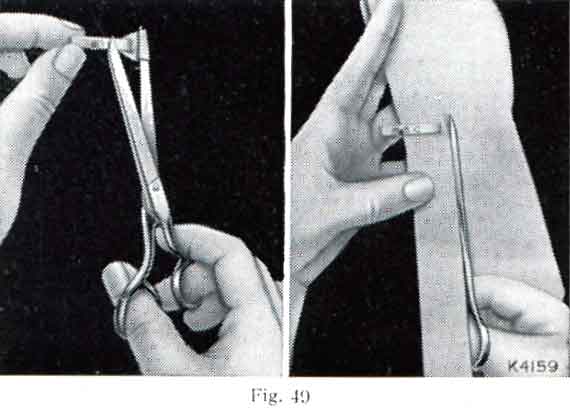
The Bias Gauge will be found very useful (especially in the case of soft materials) when cutting bias strips from 7/16 inch to 1 3/8 inches in width. This may be done by placing the bias gauge upon the point of the scissors and setting the blued indicator to the width desired. The line F is the point at which to set the blued indicator for facings, the line B for binding, and the line C for cording or piping.
Insert the material in the gauge with the edge against the blued indicator, and hold as shown in Fig. 49.
Bias binding for use with the Binder Attachment should be cut 15/16 inch wide, and to do this the indicator should be set midway between the lines F and B.
Presser feet for stitching on edge and inserting cord are made in two styles, 125035 for stitching on the left side of the needle, and 121877 adjustable for stitching on either the right or left side.
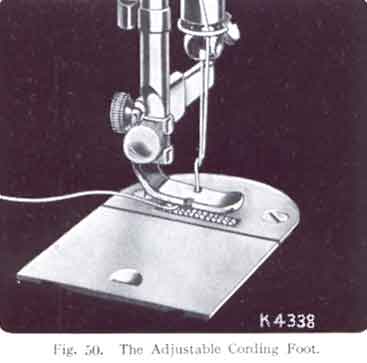
Both feet produce identical work, and the different styles meet the individual requirement of the operator.
For Edge Cording -- fold the edge of the fabric over the cord and stitch close to the cord, guiding the work by hand.
For Corded Seams -- fold the bias strip around the cord and insert the covered cord between the two pieces of fabric, with all raw edges together and the right sides of the fabric together. Then stitch close to the cord.
-
Darning
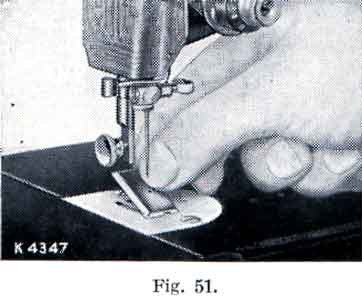
Remove the presser foot and fit Feed Cover Plate No. 108002 over the feed dog by inserting the single prong into the long slot at the front of the throat plate (see Fig. 51), pressing lightly on the cover plate until the two prongs engage in the slots at the rear of the throat plate.
Attach Spring Darning Foot No. 121094, but do not tighten the thumb screw. Stretch tightly the article to be repaired in an embroidery hoop and place below the needle by tilting the edge of the hoop. Then lower the presser bar by means of its lifter, and adjust the height of the darning foot to allow just sufficient space for the free movement of the work. After adjustment, tighten the thumb screw securely. The hoop should be moved backward and forward by the hands and the hole or damaged part completely covered with stitching in one direction before turning the work at a right angle and stitching across to complete the darn.
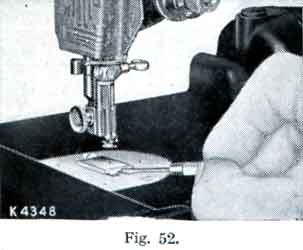
When the machine is to be used again for plain stitching, replace the presser foot and remove the feed cover plate by inserting the blade of the small screw driver in the notch and twisting to the right, as shown in Fig. 52.
-
Embroidery
For lace embroidery, i.e. open work, remove the presser foot and attach Feed Cover Plate No. 108002 and Spring Foot No. 121094, as described on page 49.
For surface embroidery, where a clear view of the stitching is required, neither foot should be used.
-
Quilter
The quilter guide can be used at either the right or left of the needle, and the distance of the guide from the needle determines the width between the rows of stitching. Slide the wire into its holder on the foot, and set it to the width desired; then lower the foot on to the material.
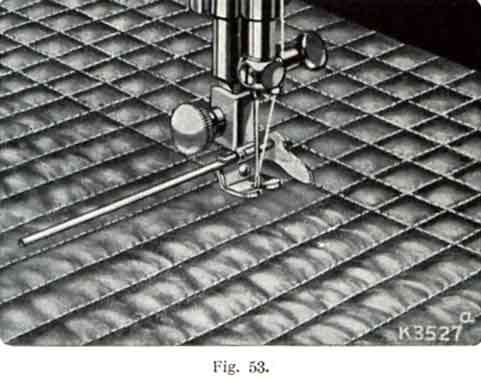
To Quilt -- For the first row of stitching, let the quilter guide follow the edge of the material, a straight crease, or a line, as preferred. Succeeding rows are made straight and at a uniform distance by keeping the previous row steadily under the guide, as shown in Fig. 53.
-
Fit the quilter foot, as shown in Fig. 54.
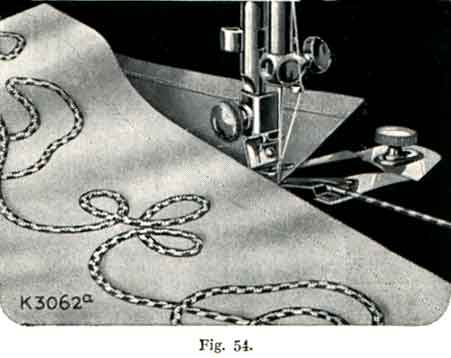
To attach the under braider, insert the downwardly projecting hook of the attachment into the hole in the throat plate at the right of the feed dog. Then place the guide thumb screw in the slot of the attachment and into the hole in the bed plate of the machine. The under braider must be firmly secured by tightening the screw.
The pattern or design to be braided must be stamped or traced on the wrong side of the material. Pass the braid from the left between the blued guide and the lower plate until it enters the back and front braid guides, and then under the needle. Place the material, wrong side up, above the braid, lower the presser foot and proceed to sew, following the lines of the design.
-
Instead of stamping or tracing the pattern on the material itself, a perforated paper design may be used.
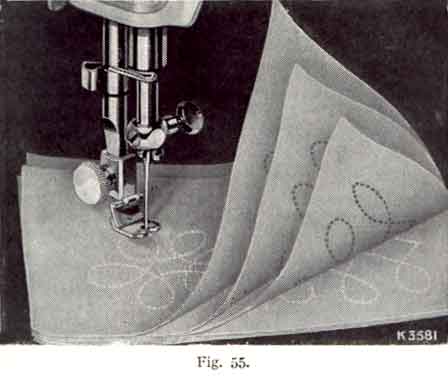
A braiding design may be copied with the sewing machine by pinning it to several sheets of paper, as shown in Fig. 55.
Attach the quilter foot and, without threading the machine, follow the design with the needle. Several copies of the design can be made in this way, one of which can then be pinned to the material to be braided and torn away when the braiding is finished.
-
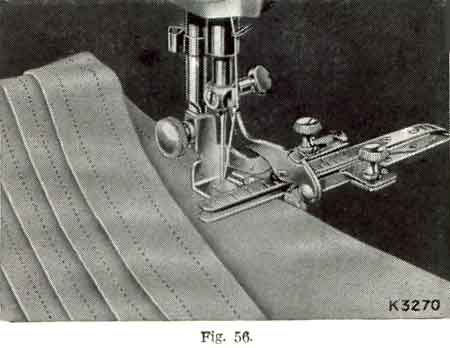
Fit the tuckmarker, as shown in Fig. 56.
The attachment has two figured scales, that in front (the space scale) in eighths and the central clip (the tuck scale) in sixteenths of an inch.
The tuck scale determines the width of the tuck. For instance, if this is required to be 1/4 inch, loosen the back thumb screw and slide the guide until its straight edge is over the figure 2, then tighten the screw.
By loosening the front thumb screw, the space scale may be moved in either direction to give the desired width between the lines of stitching. For instance, if 1/4 inch tucks are wanted with 1/4 inch clear space between each, the space scale should show the figure 3 exactly in line with the needle hole; or if no space is required, then the figure 2. When the required width is obtained tighten the thumb screw.
To operate the tuckmarker is exceedingly simple. Fold the material by hand and place it in the attachment by passing the folded edge over the upright marking point below the left hand end of the space scale, then between the tuck guide and below the foot. The lever on the top must also be down in position, as in Fig. 56, and the edge of the fold up against the small guide.
Lower the presser bar lifter and sew as usual, being careful to keep the folded edge against the guide. When the first tuck is completed the material will be found creased for the second tuck. Fold the material at the crease and, with its plain side uppermost, proceed as before. When making the last tuck, raise the lever so that it does not press on the space scale. In this position no crease for a succeeding tuck is made in the material.
Use the table below to assist you in setting the Tucker.
|
Tuck Guide
|
Space Scale
|
|
|
1/8" tucks with no space
|
1
|
1
|
|
1/8" tucks with 1/8" space
|
1
|
1 1/2
|
|
1/4" tucks with no space
|
2
|
2
|
|
1/4" tucks with 1/4" space
|
2
|
3
|
|
1/2" tucks with no space
|
4
|
4
|
|
1/2" tucks with 1/2" space
|
4
|
6
|
|
1" tucks with no space
|
8
|
8
|